【Next.js】Firebase AuthenticationとHOCを使用してサインイン機能を実装する

本記事では、Next.jsプロジェクトにFirebase Authenticationを組み込み、サインイン機能を実装するとともに、HOC(高階コンポーネント)を使用してサインインユーザーのみが閲覧できるページを作成していきます。
- Next.jsプロジェクトの準備
- サインインユーザーのみ見られるコンポーネントの作成
- 必要となるパッケージやDB接続ファイルの準備
- FirebaseでAuthentication設定
- index.jsの書き換え
- HOC(高階コンポーネント)の作成
- dashboard.jsへ追記
- index.jsに追記
- サインインをしてみる
Next.jsプロジェクトの準備
まずはNext.jsプロジェクトの準備をしていきましょう。
npx create-next-app next-firebase-auth
cd next-firebase-auth
yarn devhttp://localhost:3000/
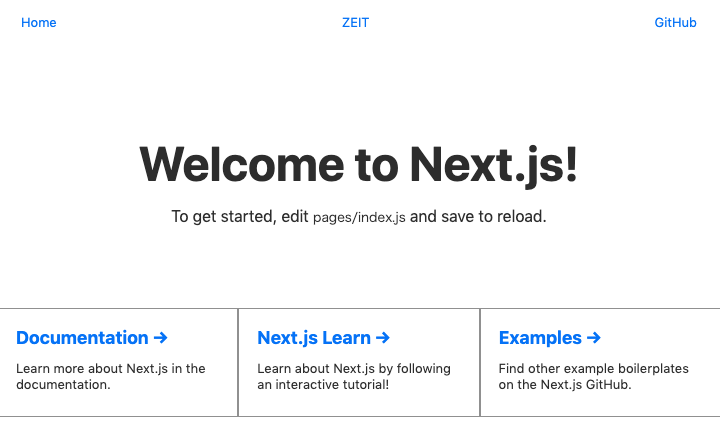
http://localhost:3000/にアクセスしてみると以下のような画面が出てくるはずです。

サインインユーザーのみ見られるコンポーネントの作成
次にサインインユーザーのみが見ることのできるコンポーネントを作成していきましょう。
cd pages
touch dashboard.js
pages/dashboard.js
import React from 'react';
import Nav from '../components/nav';
class Dashboard extends React.Component {
 render() {
   return (
     <div>
          <Nav />
          <h1>Dashboard  Page</h1>
           <p>You can't go into this page if you are not authenticated.</p>
      </div>
     )
   }
}
export default Dashboard;
まだHOCに設定していないためアクセス可能です。
必要となるパッケージやDB接続ファイルの準備
次にFirebaseの接続に必要となるパッケージやDB接続用ファイルの準備をしていきます。
まずはルートディレクトリに.envファイルを作成します。
touch .env
ここにFirebaseでプロジェクトを作成した際に発行された
たちを定数として収めていきます。
Firebaseにおけるプロジェクトの作成から上記のキーの発行手順については以下の記事に書かれています。
nekorokkekun.hatenablog.com
取得したキーたちを以下のように.envに書き込んでいきましょう。
.env
FIREBASE_API_KEY=xxxxxxxxxxxxxxxxxxxxxxxxxxxxxxxx
FIREBASE_AUTH_DOMAIN=xxxxxxxxxxxxxxxxxxxxxxxxxxxxxxxx
FIREBASE_DATABASE_URL=xxxxxxxxxxxxxxxxxxxxxxxxxxxxxxxx
FIREBASE_PROJECT_ID=xxxxxxxxxxxxxxxxxxxxxxxxxxxxxxxx
FIREBASE_STORAGE_BUCKET=xxxxxxxxxxxxxxxxxxxxxxxxxxxxxxxx
FIREBASE_MESSAGING_SENDER_ID=xxxxxxxxxxxxxxxxxxxxxxxxxxxxxxxx
FIREBASE_APP_ID=xxxxxxxxxxxxxxxxxxxxxxxxxxxxxxxx
次にnext.config.jsをルートディレクトリ直下に作成します。
touch next.config.js
next.config.js
require("dotenv").config();
const path = require("path");
const Dotenv = require("dotenv-webpack");
module.exports = {
  webpack: config => {
    config.plugins = config.plugins || [];
    config.plugins = [
      ...config.plugins,
      // Read the .env file
      new Dotenv({
        path: path.join(__dirname, ".env"),
        systemvars: true
      })
    ];
    return config;
  }
};
最後にFirebaseへ接続するためのファイルを作成しましょう。
// ルートディレクトリから
mkdir src
cd src
mkdir firebase
cd firebase
touch index.js
src/firebase/index.js
import firebase from "firebase/app";
import "firebase/auth";
const config = {
  apiKey: process.env.FIREBASE_API_KEY,
  authDomain: process.env.FIREBASE_AUTH_DOMAIN,
  databaseURL: process.env.FIREBASE_DATABASE_URL,
  projectId: process.env.FIREBASE_PROJECT_ID,
  storageBucket: process.env.FIREBASE_STORAGE_BUCKET,
  messagingSenderId: process.env.FIREBASE_MESSAGING_SENDER_ID,
  appId: process.env.FIREBASE_APP_ID
};
if (!firebase.apps.length) {
  firebase.initializeApp(config);
}
const auth = firebase.auth();
export { auth, firebase };
これでprocess.env.〇〇(定数名)という形でプロジェクト内の他ファイルから.envで設定した定数名を使用するための下準備ができました!
そして以下の2つのパッケージをインストールすることで.envで設定した定数がprocess.env.〇〇(定数名)といった形でプロジェクト内の他のファイルからアクセス可能となります。
yarn add firebase dotenv
yarn add dotenv-webpack
FirebaseでAuthentication設定
次にFirebaseのコンソール上からAuthenticationの設定をしておきましょう。
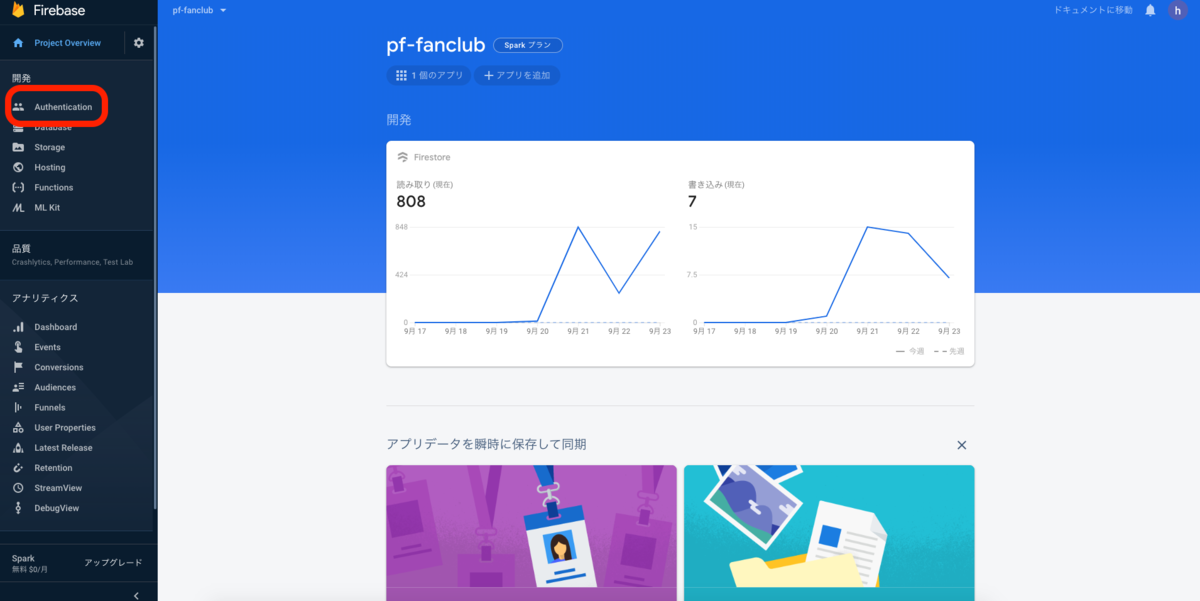
先ほど作成したFirebaseのプロジェクトにアクセスします。
そしてサイドメニューの「Authentication」をクリックしましょう。

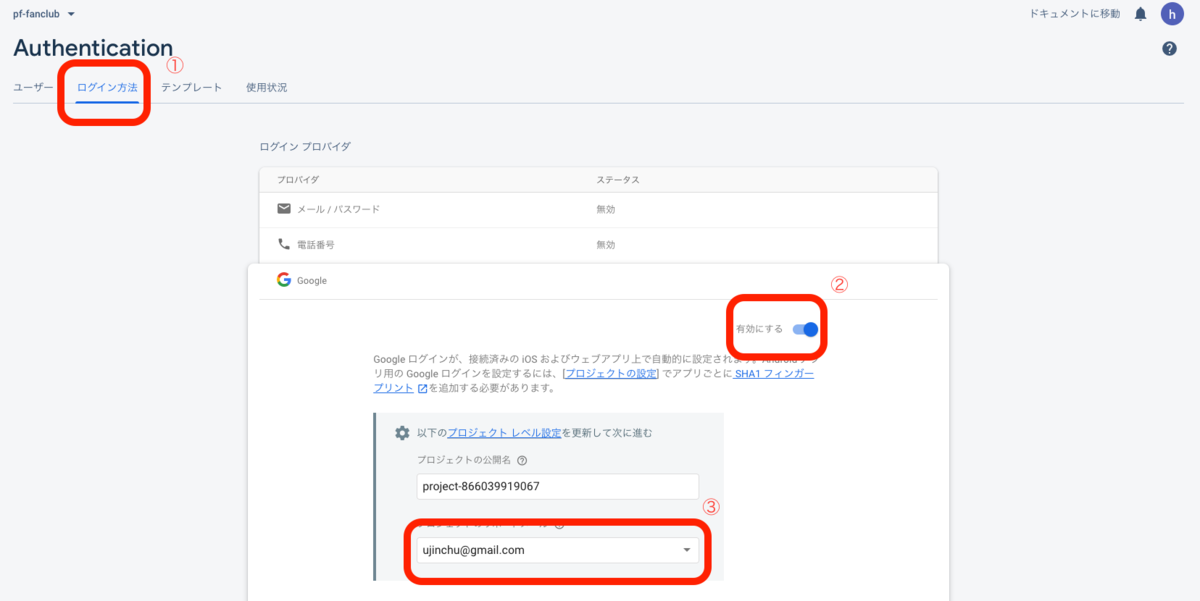
画像の順番に従い、
① タブメニューの「ログイン方法」をクリック
② 「有効にする」をオン
③ プロジェクトのサポートメールを設定
という順序で設定を完了させましょう。

index.jsの書き換え
独自のUIにしていますが、ポイントはfirebaseからauthをimportしているというところです。
import React from "react"; import Link from "next/link"; import Nav from "../components/nav"; import { auth, firebase } from "../src/firebase"; import Head from "next/head" class Home extends React.Component { render() { return ( <div> <Head title="Home" /> <Nav /> <div className="hero"> <h1 className="title"> Welcome to Firebase Authentication in Next.js! </h1> <p className="description"> Click on the Dashboard link to visit the dashboard page. </p> <div className="row"> <Link href="/dashboard"> <a className="card"> <h3>Go to Dashboard→</h3> <p>Visit Dashboard</p> </a> </Link> </div> </div> <style jsx>{` .hero { width: 100%; color: #333; } .title { margin: 0; width: 100%; padding-top: 80px; line-height: 1.15; font-size: 48px; } .title, .description { text-align: center; } .row { max-width: 880px; margin: 80px auto 40px; display: flex; flex-direction: row; justify-content: space-around; } .card { padding: 18px 18px 24px; width: 220px; text-align: left; text-decoration: none; color: #434343; border: 1px solid #9b9b9b; } .card:hover { border-color: #067df7; } .card h3 { margin: 0; color: #067df7; font-size: 18px; } .card p { margin: 0; padding: 12px 0 0; font-size: 13px; color: #333; } `}</style> </div> ); } } export default Home;
HOC(高階コンポーネント)の作成
いよいよHOC(高階コンポーネント)を作成します。
高階コンポーネントについて今回は詳しく解説しませんが、「通常のコンポーネントに機能を追加するもの」という認識でOKです。
今回のHOCで追加する機能が「サインイン後に見ることができる」というものですね。
// src直下で
mkdir helpers
cd helpers
touch withAuth.js
src/helpers/withAuth.js
import React from "react";
import router from "next/router";
import { auth } from "../firebase";

const withAuth = Component => {
  return class extends React.Component {
    constructor(props) {
      super(props);
      this.state = {
        status: "LOADING"
      };
    }
    componentDidMount() {
      auth.onAuthStateChanged(authUser => {
        if (authUser) {
          this.setState({
            status: "SIGNED_IN"
          });
        } else {
          router.push("/");
        }
      });
    }
    renderContent() {
      const { status } = this.state;
      if (status == "LOADING") {
        return <h1>Loading ......</h1>;
      } else if (status == "SIGNED_IN") {
        return <Component {...this.props} />;
      }
    }
    render() {
      return <>{this.renderContent()}</>;
    }
  };
};
export default withAuth;
こちらは細かく解説していきましょう。
引数でComponentを受ける
const withAuth = Component => {
後ほど「サインイン後しか見られないコンポーネント」を設定する際に
export default withAuth(コンポーネント名)
という書き方でexportします。
この「コンポーネント名」で指定されたコンポーネントが、withAuthの引数に設定された「Component」を指しています。
ユーザー認証されるまではstateで読み込みが「Loading」
    constructor(props) {
      super(props);
      this.state = {
        status: "LOADING"
      };
    }
stateの状態は基本的に「LOADING」(=見認証の状態)にしておき、
ユーザー認証されて初めてstateが「SIGNED IN」の状態となります。
authUserで認証の可否を判別
    componentDidMount() {
      auth.onAuthStateChanged(authUser => {
        if (authUser) {
          this.setState({
            status: "SIGNED_IN"
          });
        } else {
          router.push("/");
        }
      });
    }
サインインが成功した場合、「authUser」インスタンスの中には、ユーザー情報が入ることになります。そうするとif文でstateのstatusが「SIGNED_ID」になり、コンテンツを見ることができるようになります。
uid(=ユーザーID)やメールアドレスなどが入っているため、サインイン後にも利用できそうですね!
もしユーザーが未認証の場合にはauthUserは空のままのため、elseの方に行き、そのままトップページに遷移することとなります。
statusがLOADINGのままだと、LOADINGという画面が表示されることとなります。それが以下のものですね。
    renderContent() {
      const { status } = this.state;
      if (status == "LOADING") {
        return <h1>Loading ......</h1>;
      } else if (status == "SIGNED_IN") {
        return <Component {...this.props} />;
      }
    }
そしてstatusがSIGNED_INだと、HOCでサインインユーザーのみが見られるComponentを表示できるようになっています。
dashboard.jsへ追記
先ほど作成したdashboard.jsにwithAuth.jsを合体させる形で追記しましょう。
pages/dashboard.js
import React from 'react';
import Nav from '../components/nav';
// 追加
import withAuth from "../src/helpers/withAuth";

class Dashboard extends React.Component {
 render() {
   return (
     <div>
          <Nav />
          <h1>Dashboard  Page</h1>
           <p>You can't go into this page if you are not authenticated.</p>
      </div>
     )
   }
}
// withAuthの引数にdashboard.jsを追加
export default withAuth(Dashboard);
これでサインインユーザーのみがdashboard.jsを見られるような設定となりました!
index.jsに追記
次にサインインなどの処理を行うためのコードをpages/index.jsに追記します。
pages/index.js
import React from "react"; import Link from "next/link"; import Nav from "../components/nav"; import { auth, firebase } from "../src/firebase"; import Head from "next/head" class Home extends React.Component { // ここから下を追加 handleSignIn = () => { var provider = new firebase.auth.GoogleAuthProvider(); provider.addScope("https://www.googleapis.com/auth/contacts.readonly"); auth .signInWithPopup(provider) .then(() => { alert("You are signed In"); }) .catch(err => { alert("OOps something went wrong check your console"); console.log(err); }); }; handleSignout = () => { auth .signOut() .then(function() { alert("Logout successful"); }) .catch(function(error) { alert("OOps something went wrong check your console"); console.log(err); }); }; // ここまでを追加 render() { return ( <div> <Head title="Home" /> <Nav /> <div className="hero"> <h1 className="title"> Welcome to Firebase Authentication in Next.js! </h1> <p className="description"> Click on the Dashboard link to visit the dashboard page. </p> <div className="row"> <Link href="/dashboard"> <a className="card"> <h3>Go to Dashboard→</h3> <p>Visit Dashboard</p> </a> </Link> {/* ここから下2行を追加 */} <button onClick={this.handleSignIn}>Sign In using google</button> <button onClick={this.handleSignout}>Signout</button> </div> </div> <style jsx>{` .hero { width: 100%; color: #333; } .title { margin: 0; width: 100%; padding-top: 80px; line-height: 1.15; font-size: 48px; } .title, .description { text-align: center; } .row { max-width: 880px; margin: 80px auto 40px; display: flex; flex-direction: row; justify-content: space-around; } .card { padding: 18px 18px 24px; width: 220px; text-align: left; text-decoration: none; color: #434343; border: 1px solid #9b9b9b; } .card:hover { border-color: #067df7; } .card h3 { margin: 0; color: #067df7; font-size: 18px; } .card p { margin: 0; padding: 12px 0 0; font-size: 13px; color: #333; } `}</style> </div> ); } } export default Home;
こちらも少し解説をします。
以下はサインイン・サインアウトの処理を行うイベントの設定です。
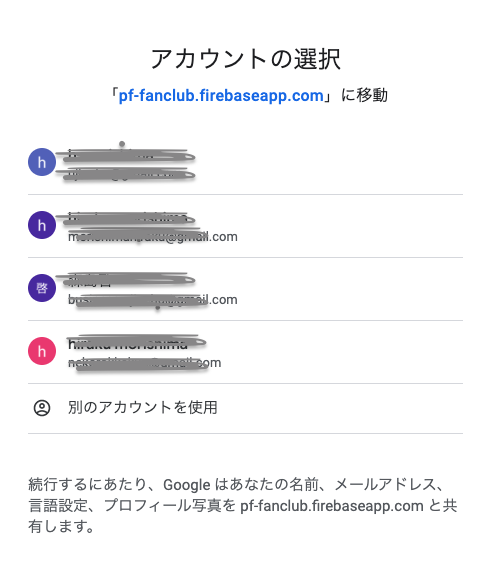
handleSignInでは、ボタンを押すとサインインモーダルウィンドウがポップアップし、サインイン処理ができるという流れになります。
こちらは私たちが作り込む必要はありません。
  handleSignIn = () => {
    var provider = new firebase.auth.GoogleAuthProvider();
    provider.addScope("https://www.googleapis.com/auth/contacts.readonly");
    auth
      .signInWithPopup(provider)
      .then(() => {
        alert("You are signed In");
      })
      .catch(err => {
        alert("OOps something went wrong check your console");
        console.log(err);
      });
  };
handleSignoutも同じくで、Signout()メソッドを使えば簡単にユーザーを未承認の状態に戻してくれます。
  handleSignout = () => {
    auth
      .signOut()
      .then(function() {
        alert("Logout successful");
      })
      .catch(function(error) {
        alert("OOps something went wrong check your console");
        console.log(err);
      });
  };
そして、上記2つのイベントを呼び出すのが以下のbuttonですね。
            <button onClick={this.handleSignIn}>Sign In using google</button>
            <button onClick={this.handleSignout}>Signout</button>
